REVIEW · RHODES TOWN
Rhodes: Stained glass workshop
Book on GetYourGuide →Operated by CDeep Workshop · Bookable on GetYourGuide
Rhodes has plenty of beaches and ancient stones, but this workshop gives you something different: a handmade souvenir built by your own hands. I like the tiny class size, limited to just two students, and I like that Linda guides you through every stage, from safe glass cutting to the final soldered join. You leave with a piece up to 15 centimeters, not a shop-bought trinket.
The catch is time and effort. This is a focused 4.5-hour craft session, not a quick drop-in activity, and cutting, grinding, and soldering demand patience. You must wear closed-toe shoes, and the workshop is not suitable for children under 16, pregnant women, wheelchair users, or people over 80.
In This Review
- Key points to know before booking
- Why this Rhodes workshop is worth making time for
- Meeting Linda at CDeep Workshop
- The first 40 minutes: tools, practice, and safe glass cutting
- Choosing a pattern with up to 10 pieces
- Selecting the colored opal glass
- Cutting the opal glass to match your design
- Grinding the edges for a clean fit
- Thirty minutes of copper tape
- The final half-hour: soldering the suncatcher
- What the $130 price includes
- Who will enjoy this class most
- Practical planning for your Rhodes day
- Should you book the CDeep stained glass workshop?
- FAQ
- How long does the stained glass workshop last?
- How much does the workshop cost?
- What will I make during the class?
- Is the workshop suitable for beginners?
- Who teaches the workshop?
- How many people can join the workshop?
- Are materials and tools included?
- Are food and drinks provided?
- What should I wear?
- Can I cancel for a refund?
Key points to know before booking
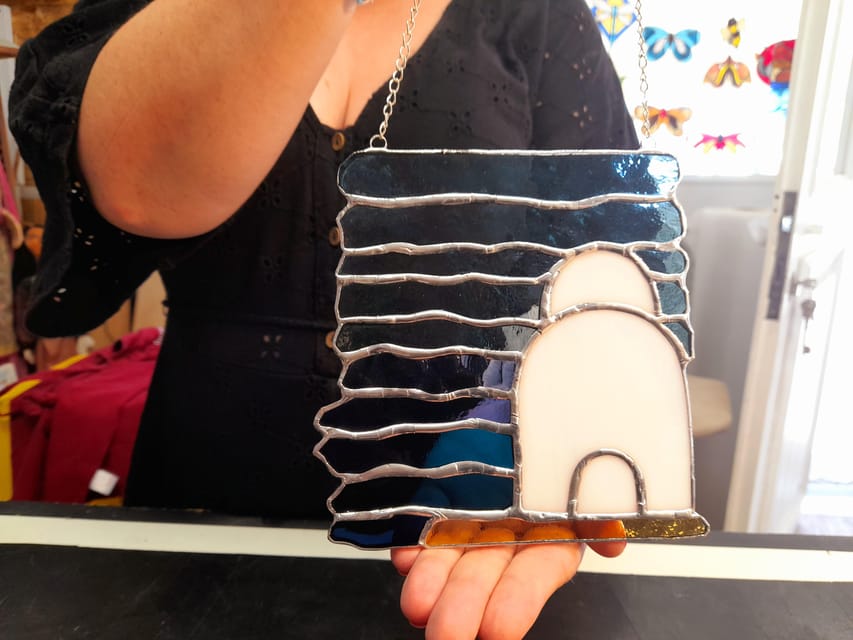
- A two-person class: You get close attention from Linda rather than a large-group demonstration.
- A real Tiffany-method project: You cut glass, smooth the edges, apply copper tape, and solder the pieces together.
- Beginner-friendly patterns: Choose a design of up to 10 pieces, with each finished piece measuring no more than 15 centimeters.
- A useful four-and-a-half-hour pace: The schedule allows time to practise before you work with colored glass.
- Everything needed is supplied: Tools, materials, gloves, goggles, aprons, drinks, and snacks are included.
- A personal Rhodes keepsake: Your finished suncatcher is made during the workshop and goes home with you.
Why this Rhodes workshop is worth making time for

I like experiences that let you do more than look at a place. This one gives you a quiet, creative half-day in Rhodes, with a finished object to remind you of the island long after your holiday ends. The activity is not about producing museum-quality glass on your first attempt. It is about learning the basic process and making something you can honestly call your own.
The small class size matters. With only two participants, Linda can watch how you handle the cutter, correct a shaky technique, and help you decide how to deal with an awkward piece of glass. That sort of attention is hard to get in a class of 10 or 20 people. It also makes the session feel relaxed instead of rushed.
You will work with colored opal glass, which gives the final suncatcher a soft, opaque look. The finished piece is compact, up to 15 centimeters, so it is practical to pack. It should fit far more easily in your luggage than a large ceramic or framed artwork.
The main limitation is that the workshop takes most of a day. If your Rhodes schedule is already packed with the Old Town, Lindos, beaches, and ferry trips, you will need to protect a four-and-a-half-hour block. This is also not the right choice if you want a passive activity. Your hands will be busy for most of the session.
You can also read our reviews of more tours and experiences in Rhodes Town.



Meeting Linda at CDeep Workshop
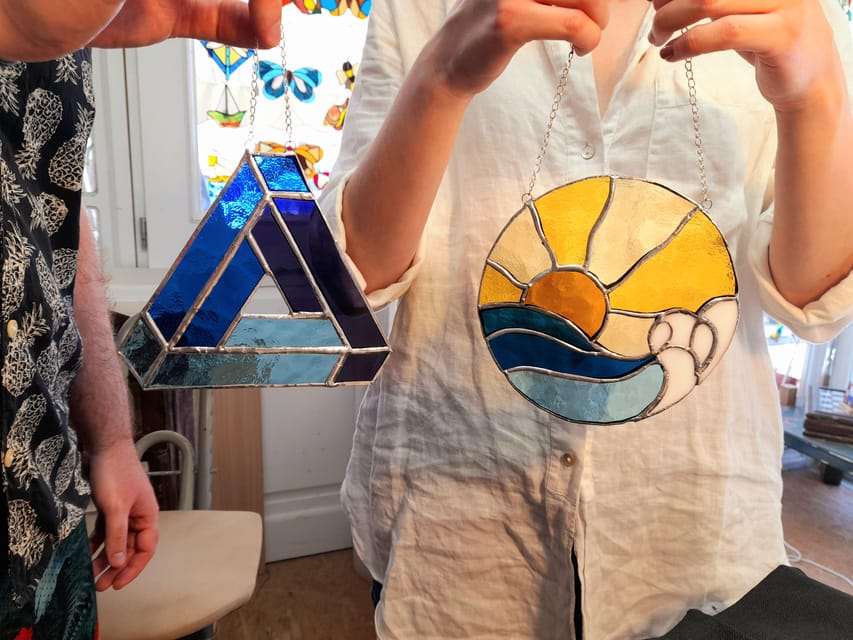
The experience begins at the workshop, marked by a sign on the side of the road. The activity finishes at the same meeting point, so you do not need to arrange a separate end location.
The instructor is Linda, and the class is offered in Greek and English. Her teaching style is central to the experience. She creates a friendly setting, explains each stage clearly, and stays close by as you work. That is especially helpful if you have never handled a glass cutter or soldering iron before.
You should arrive wearing closed-toe shoes. Sandals and flip flops are not allowed, which is sensible around sharp glass and workshop tools. Gloves, goggles, and aprons are provided, along with the other materials and equipment.
Tea, coffee, juices, and light snacks are available throughout the class. This is a small but useful touch. Four and a half hours is long enough for a drink break, and you can keep working without having to leave the workshop to find refreshments.
The first 40 minutes: tools, practice, and safe glass cutting

The workshop starts with a short introduction to the tools. You learn what each item does and how to use it properly. This first 10-minute stage may sound basic, but it sets the tone for the rest of the class. Stained glass rewards careful handling, not force.
Next comes roughly 30 minutes of practice cutting clear glass. You learn different cutting angles and styles before choosing your colored glass. This is one of the strongest parts of the schedule because you get a chance to make mistakes on practice material.
Do not expect the glass cutter to work like a knife. The technique requires control and a feel for the correct pressure. Linda’s close guidance is useful here, since a small adjustment can make a cleaner cut. You will also start to understand why the workshop takes several hours. Even a simple design depends on accurate edges.
This practice stage should help you feel less nervous when you begin cutting the opal glass. It also gives you a better idea of the craft behind the finished object. The work may look simple when you see a small suncatcher hanging in a window, but each shape needs attention.
Choosing a pattern with up to 10 pieces
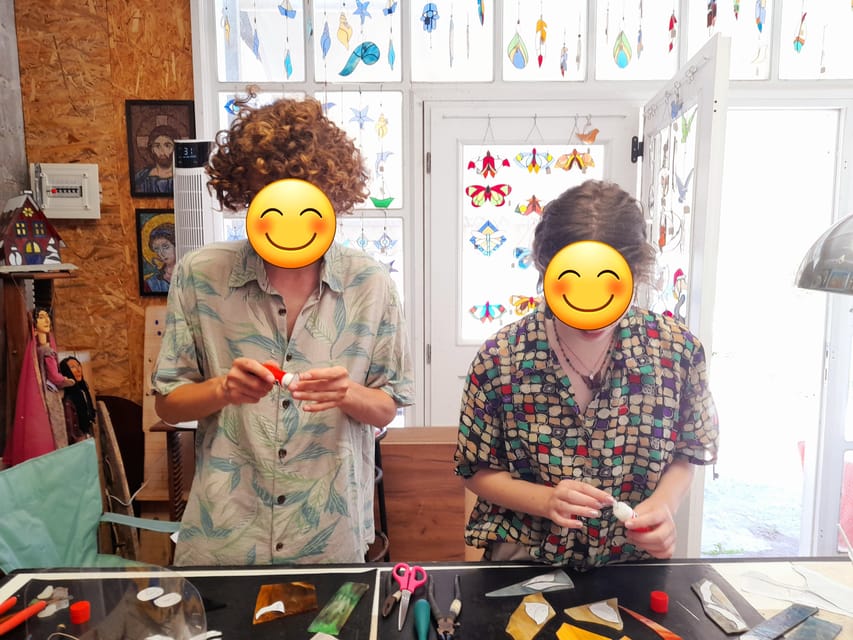
After practicing, you select a pattern. The available designs are suitable for beginners and contain up to 10 pieces. That limit is important. A small number of pieces keeps the project manageable within one session and gives you a fair chance of finishing your design.
You may choose from the provided patterns, and you can select something that fits your taste and confidence. A simpler pattern means fewer cuts, fewer edges to grind, and fewer joins to solder. A more detailed option may give you a busier finished image, but it also asks for more care.
The best advice is to choose a design you can finish comfortably rather than chasing the most complicated pattern. The satisfaction comes from completing the work yourself. Since each finished piece can be no larger than 15 centimeters, the design needs to suit that compact format.
This is also the moment to ask Linda questions. The class is not a race. You are there to make a personal souvenir, and the pattern choice shapes every step that follows.
Selecting the colored opal glass
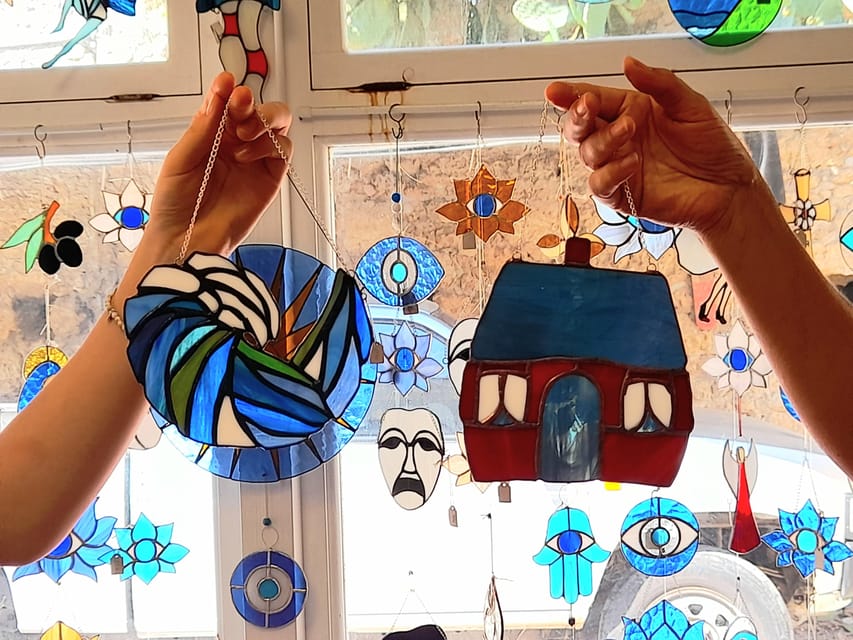
Once the pattern is chosen, you select the colored opal glass for each part. This is where the project begins to feel personal. Two students could use the same design and produce noticeably different suncatchers simply by choosing different colors.
The workshop offers a variety of colored opals. You will consider how the shades work together and which color belongs in each section. Because the piece is small, color choices have a strong effect. A single bright section may become the focal point, while softer shades can give the design a calmer appearance.
I like this part because it combines craft with decision-making. You are not just following instructions. You are making choices that affect the final object.
The class structure also keeps this stage practical. Linda can help you understand which pieces need to be cut from which sections of glass and how your choices fit the pattern. If you are uncertain, you have someone there to guide you before you start cutting.



Cutting the opal glass to match your design
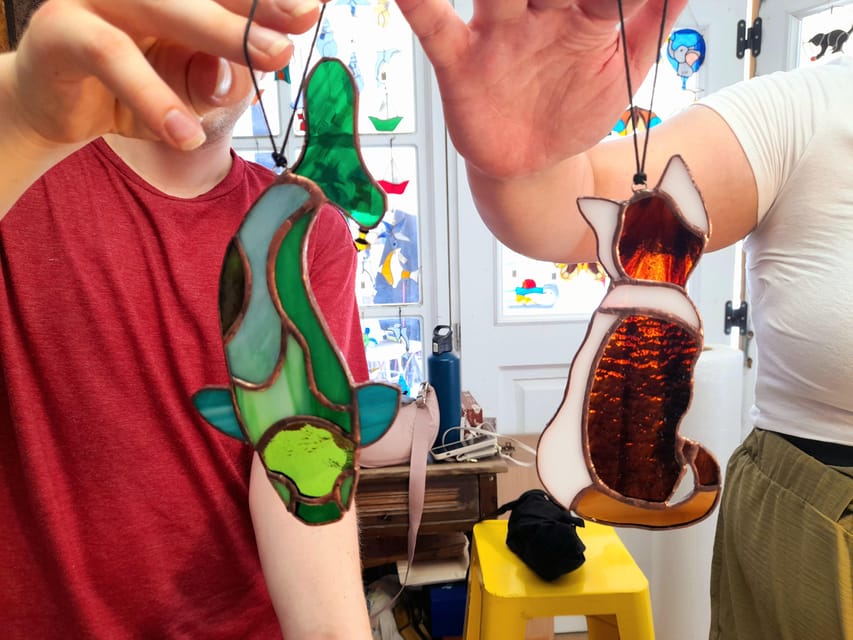
The next stage takes about an hour. You cut each piece of colored opal glass to match the pattern. This is the heart of the workshop, and it is where the earlier practice with clear glass becomes useful.
Each section must be cut with care. The goal is not merely to produce a shape that looks close to the paper pattern. The pieces need edges that can meet properly when the design is assembled. You may need to work slowly and accept that a clean result matters more than speed.
For beginners, this is likely to be the most demanding part. Glass cutting has a technical side, and the design will not forgive careless measurements. The benefit of this small class is that Linda can step in with advice as needed, without taking over the project.
You still do the work yourself. That matters if you want the finished suncatcher to feel like your souvenir rather than an item made for you by the instructor.
Grinding the edges for a clean fit
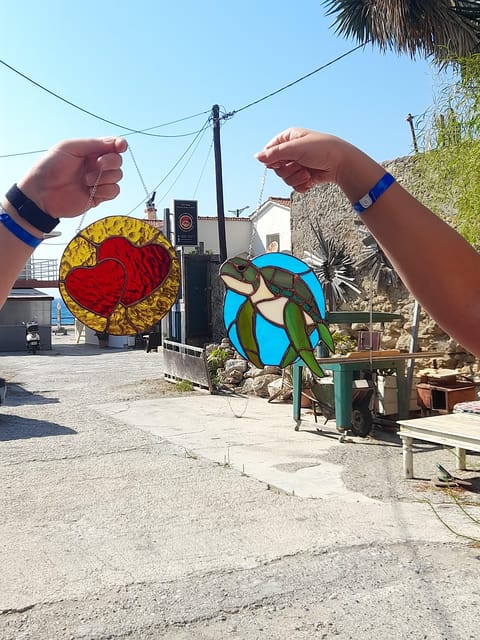
After cutting comes about an hour of grinding. The sharp or uneven edges of the glass are corrected and smoothed before the next stage.
This may be the least glamorous part of the process, but it is essential. A good fit between pieces makes the later assembly easier, and smoothing the edges also makes the pieces safer to handle. It is careful, repetitive work, so this is where patience pays off.
The grinding stage gives you time to inspect your design. You can see how the individual shapes begin to relate to one another and correct problems before the pieces are joined. If a section does not fit well, this is the point to improve it.
You should not expect every edge to look machine-perfect. You are learning a handmade process, and small irregularities are part of the result. Linda’s help is valuable here because she can show you how much material to remove and when to stop.
Thirty minutes of copper tape

Once the glass edges are smooth, you apply copper tape to each piece. This takes about 30 minutes.
The tape is placed along the edges of the glass. It creates the surface that will later receive solder and allows the separate pieces to be joined. The task sounds straightforward, but neat application matters. Uneven tape can affect the way the finished seams look.
This is another stage where a small design works in your favor. With no more than 10 pieces, you can complete the taping without the job becoming excessive. You will also have time to check that each section is covered properly.
By now, your pattern should look less like loose glass and more like a real design. The copper tape marks the transition from preparation to assembly.
The final half-hour: soldering the suncatcher
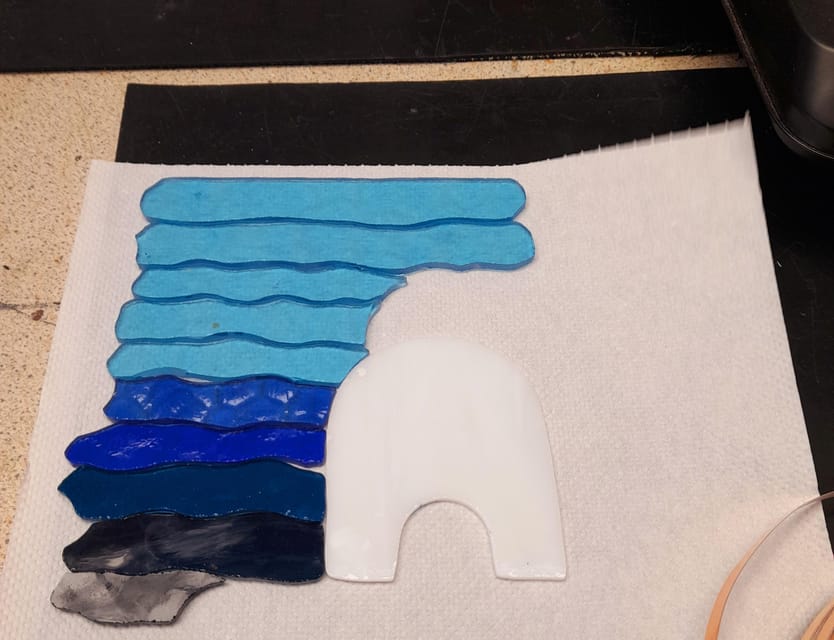
The last step is soldering, which takes about 30 minutes. The taped pieces are joined together, and the design finally becomes a single object.
Soldering is the most dramatic part of the class because the separate pieces come together in front of you. It also requires attention and care. You work with the guidance of the instructor, following the correct process rather than rushing to finish.
The final result is your own stained glass suncatcher, made in the pattern and colors you selected. It is small enough to take home, yet it represents several hours of cutting, grinding, taping, and joining.
The finished piece may not be perfectly uniform, and that is part of its appeal. You will see evidence of your decisions and your developing technique. The object carries more meaning than a ready-made souvenir because you took part in every major stage.
What the $130 price includes
At $130 per person, this is not a bargain activity in the same way as a short museum visit or a standard sightseeing stop. The price makes more sense when you consider what is included and how much individual instruction you receive.
You get all glass, patterns, copper tape, soldering supplies, and other workshop materials. Tools are supplied as well, so you do not need any prior equipment or experience. Gloves, goggles, and aprons are included for protection.
You also receive drinks and snacks throughout the session. Most important, the class is limited to two participants. The price buys time with Linda, not simply access to a room full of materials.
For me, the value depends on what you want from your Rhodes holiday. If you are searching for the cheapest possible activity, this will seem expensive. If you want a small-group lesson and a personal object to take home, the cost is easier to justify.
The handmade result is also part of the value. You are not paying for a souvenir alone. You are paying to learn how it is made and to spend several hours creating it.
Who will enjoy this class most
This workshop suits adults and older teenagers who enjoy making things with their hands. You do not need previous stained glass experience. The practice session, beginner patterns, and close instruction are designed to help newcomers get started.
It is a good choice for:
- Couples or friends who want a shared creative activity
- Solo visitors who prefer a personal lesson
- Art lovers interested in the Tiffany method
- Anyone seeking a souvenir with a story behind it
- Visitors who need a break from sightseeing and beach time
The class may not suit you if you dislike detailed manual work or want a fast activity. The cutting and grinding stages take time, and you need to stay focused.
The age and safety limits are clear. Children under 16 cannot take part. The activity is also not suitable for pregnant women, wheelchair users, or people over 80. Anyone with limited comfort around sharp tools should consider that before booking.
Practical planning for your Rhodes day
Set aside the full 4.5 hours. Starting times vary, so check availability when choosing your date. Since the activity returns to the meeting point, you can plan the rest of your day from there, but avoid booking another fixed appointment too close to the workshop.
Wear closed-toe shoes. Sandals and flip flops are not permitted, and this rule is not optional. Comfortable clothing is sensible because you will be working at a table for an extended period, though gloves, goggles, and aprons are supplied.
English and Greek are the available languages. If you are booking with a partner or friend, remember that the total group size is limited to two participants, not two pairs or a small family group.
The provider offers free cancellation up to 24 hours before the activity for a full refund. You can also reserve now and pay later, which helps if your Rhodes schedule is still changing.
Should you book the CDeep stained glass workshop?
Book it if you want a small, hands-on class and like the idea of returning home with something you made yourself. Linda’s patient guidance, the two-person format, and the clear step-by-step process make this a strong choice for beginners.
Skip it if your holiday schedule cannot spare half a day, or if you want a simple activity with little concentration. The $130 price is fair for the materials, refreshments, finished piece, and private attention, but it is still a considered purchase.
For the right person, this is one of those activities that changes the pace of a Rhodes trip. You spend the session learning a practical craft, making your own design choices, and leaving with a small window decoration that carries a real memory of the island.
FAQ
How long does the stained glass workshop last?
The workshop lasts 4.5 hours. Starting times vary, so check availability when booking.
How much does the workshop cost?
The price is $130 per person.
What will I make during the class?
You will make a stained glass suncatcher using the Tiffany method. The finished piece can contain up to 10 pieces and measure no more than 15 centimeters.
Is the workshop suitable for beginners?
Yes. The class includes practice with clear glass, beginner-friendly patterns, and step-by-step guidance from the instructor.
Who teaches the workshop?
The instructor is Linda from CDeep Workshop. Instruction is available in Greek and English.
How many people can join the workshop?
The class is limited to two participants.
Are materials and tools included?
Yes. The price includes all materials and tools, plus gloves, goggles, and aprons.
Are food and drinks provided?
Tea, coffee, juices, and some snacks are provided throughout the workshop.
What should I wear?
You must wear closed-toe shoes. Sandals and flip flops are not allowed.
Can I cancel for a refund?
Yes. You can cancel up to 24 hours in advance for a full refund. The activity also offers a reserve now and pay later option.