REVIEW · RHODES
Stained Glass Workshop
Book on Viator →Operated by One day stained glass course · Bookable on Viator
The best part of this Rhodes workshop is that you do not simply watch someone make stained glass. You cut, grind, tape, and solder your own small design, with Linda guiding you through each step. I like the two-person limit, which gives you real one-to-one help, and I like that practice takes place on scrap glass before you touch the colored pieces. The main drawback is the price, $136.49 per person, which is a serious spend for a half-day activity.
I also like the unhurried pace. You get nearly five hours, drinks, snacks, and enough time to fix mistakes without feeling pushed along. Expect to spend much of the session standing at a workbench, though stools are available between tasks. Closed shoes and sensible clothing are required, and the course is not suitable during pregnancy or breastfeeding.
In This Review
- Key points at a glance
- A hands-on Rhodes souvenir, not a quick craft stop
- Why the two-person limit matters
- The first 65 minutes: tools, practice, and choosing a pattern
- Choosing opal glass and cutting your design
- Grinding edges for a clean fit
- Copper foil and the final soldering stage
- Snacks, timing, and the value of the price
- Who will enjoy this workshop most
- What makes the experience feel personal
- Should you book the Rhodes stained glass workshop?
- FAQ
- Where does the stained glass workshop take place?
- What time does the class begin?
- How long does the experience last?
- How many people can participate?
- What will I make during the workshop?
- What skills will I learn?
- Are food and drinks included?
- Is transportation included?
- What should I wear, and are there participation restrictions?
Key points at a glance
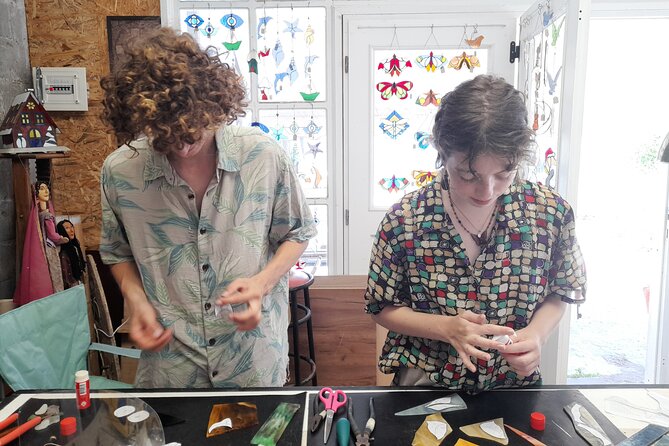
- Only two people per class: The small group size allows Linda to give close, practical instruction throughout the project.
- You make a real suncatcher: Your finished piece is cut, copper-taped, and soldered by you, not assembled in advance.
- The full Tiffany method is covered: You learn the tools, glass cutting, grinding, copper foiling, and soldering.
- Practice comes before colored glass: You first work with clear glass, which helps you learn the basic cuts with less pressure.
- Snacks and drinks are included: Coffee, tea, juices, and snacks are available during the 4-hour-45-minute class.
- It is a private activity: Only your party participates, with a maximum of two people in the class.
A hands-on Rhodes souvenir, not a quick craft stop
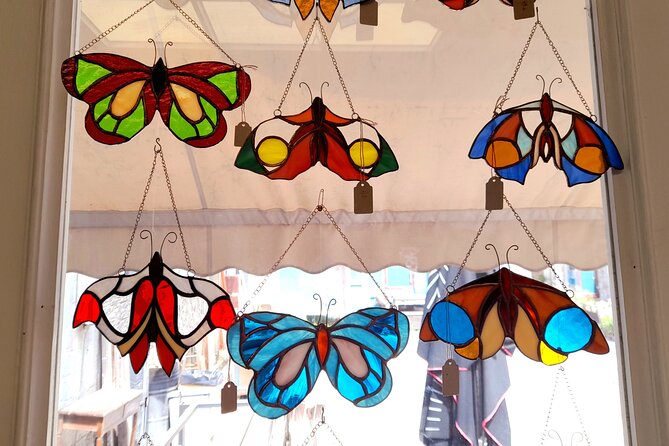
This is a proper workshop rather than a short holiday craft demonstration. At Ir. Politechniou 9 in Rhodes Town, you work in Linda’s studio with a selection of colorful opal glass and beginner-friendly patterns.
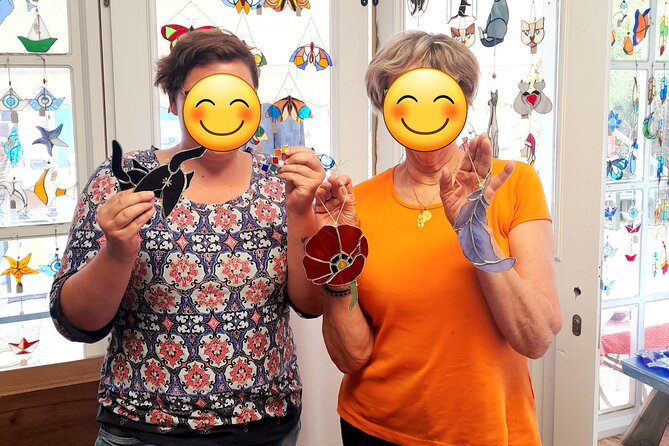
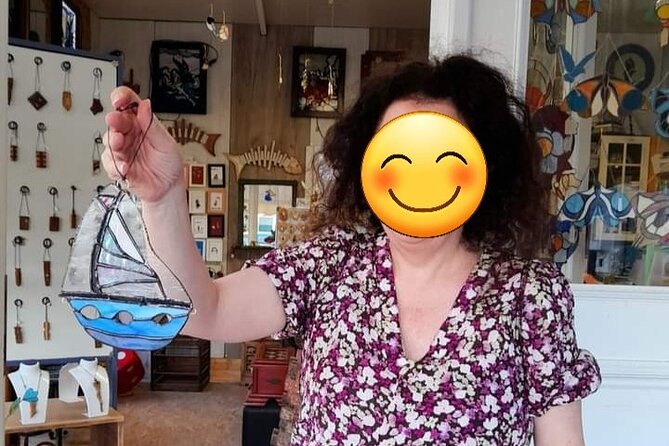
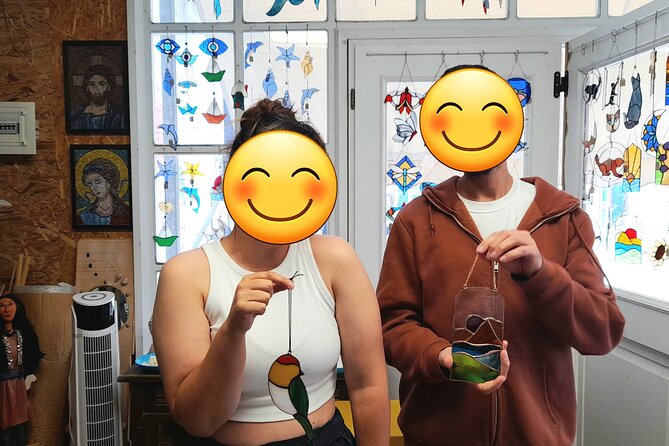
The finished item is a suncatcher. That matters because you leave with something personal and usable, not just a memory of trying a tool for ten minutes. Your design may not look factory-perfect, and that is part of its value. The small irregularities show that you made it yourself.
The class follows the Tiffany method, a style of stained glass that uses copper foil around individual pieces before they are soldered together. You will not master the entire craft in one morning, but you will learn the basic sequence clearly enough to understand how stained glass is made and to decide if you want to continue.
I would choose this activity for a couple or two friends who enjoy making things together. It also suits a solo maker who wants close tuition. It is less suitable if you want a passive indoor activity, a fast souvenir purchase, or a class with a large social group.
A few more Rhodes tours and experiences worth a look



Why the two-person limit matters
The class accepts no more than two people. This is the feature that most changes the experience. Glass cutting and soldering are practical skills, and a teacher can spot a hand position or cutting angle much more easily with one or two students than with a full room.
Linda explains each stage step by step and lets you practice before moving on. That approach is especially useful if you have never handled stained glass tools. You can ask the same question twice, pause when a cut feels uncertain, or take extra time at the grinder without holding up a larger group.
The small class also makes the outing feel private. Only your group participates, so you do not have to perform in front of strangers or share a crowded workbench. For a couple, this can be a good rainy-day activity in Rhodes. For friends, it gives you a shared project, though you should be ready to spend most of the session focused on your own piece.
The tradeoff is availability. A two-person class has very few places in each time slot, and this experience is booked an average of 26 days ahead. If the date matters to you, reserve well before your Rhodes visit.
The first 65 minutes: tools, practice, and choosing a pattern

The workshop begins at 10:00 a.m. with about ten minutes of familiarization with the tools. You learn what each tool does and how it is used in stained glass production. This opening may feel basic, but it prevents the rest of the class from becoming a guessing game.
Next comes about 30 minutes of cutting practice with clear glass. You work on different angles and cutting styles, repeating the process until you feel ready to use the colored opal glass. This is a smart order for beginners. Clear glass is easier to treat as practice material, and repeating the movement helps you learn that stained glass cutting is controlled rather than forceful.
Do not expect every piece to break perfectly on the first try. The point of this stage is to get used to the tools and to learn how a cut behaves. If you are nervous about making a mistake, this is the part that should settle you.
After practice, you spend about 25 minutes choosing a pattern. The designs are made for beginners and contain up to ten pieces. That limit keeps the project manageable within one class. A pattern with fewer pieces also means less cutting, grinding, and foiling, so you have a better chance of finishing your suncatcher during the allotted time.
You still get a creative choice. The pattern gives you a structure, but the final look depends on your glass colors and your workmanship. This is a good balance for a first project. A completely open design might be too difficult, while a fixed kit would leave little room for personal decisions.
Choosing opal glass and cutting your design

Once you have selected a pattern, you choose the colored opal glass, with about 25 minutes set aside for this stage. The word choice matters here. Your suncatcher is not limited to one prepared color scheme, so you can decide which pieces should contrast and which should work together.
This part may take longer than you expect because the glass itself is part of the design. A pattern can look very different when you change the color of one section. You might find that a shade looks different under the studio light than it does beside another piece. Linda can explain the process, but you still make the final selection.
The next step is cutting each pattern piece from the opal glass. This takes about an hour. Every section of your design must be cut separately, so this is the first long stretch of concentrated work.
Your earlier clear-glass practice now becomes useful. You apply the cutting methods to the material that will actually appear in your finished suncatcher. The task requires patience. If a piece does not follow the line as planned, you may need to adjust it rather than rush into the next stage.
The supplied structure allows time to work at your own pace, but the class still has a fixed duration. The two-person format helps here because Linda can give individual assistance while you work. You should see the workshop as a careful making session, not as a timed contest.
Grinding edges for a clean fit
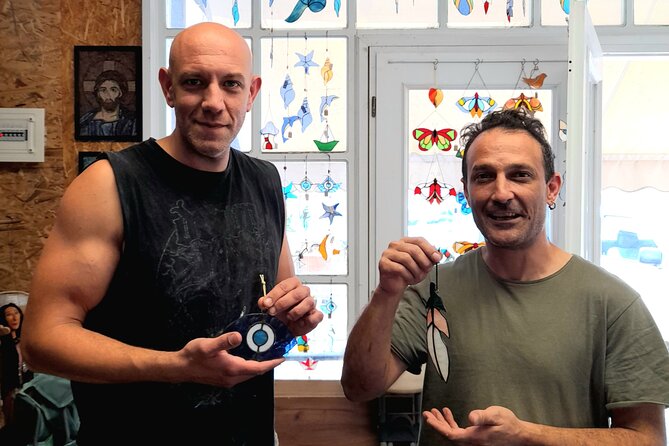
After cutting, you spend about an hour grinding the edges of the glass. This is one of the less glamorous parts of the craft, but it is essential. The grinder smooths and corrects the sides of each piece so they fit the design more cleanly and can later receive copper tape.
This step is also where the separate pieces begin to feel like one project. Cutting creates rough shapes. Grinding refines them. You can see whether the lines meet properly and make small corrections before the pieces are joined.
An hour at this stage tells you something useful about the workshop: the class does not skip the slow work. A short tourist activity might hand you pre-cut glass and move straight to decoration. Here, you take part in the preparation that makes the final assembly possible.
You will likely spend a lot of time standing at the workbench during cutting and grinding. Stools are available for sitting in between tasks, but this is not a seated class from start to finish. Wear sensible clothing that you do not mind using around a workbench, and choose closed shoes.
The activity is described as suitable for most people, but it is specifically not suitable if you are pregnant or breastfeeding. That restriction, along with the standing and the use of workshop tools, is worth considering before you book.






Copper foil and the final soldering stage
With the edges smoothed, you apply copper tape to each piece. This takes about 40 minutes. The tape covers the edges of the glass and creates the surface that can be soldered.
It is a fiddly stage, and neat application helps the final piece look better. You need to cover the edges consistently rather than simply wrap the tape around as quickly as possible. Linda’s close attention is useful here, since a small adjustment at this point can make the final joining easier.
Finally, the pieces are joined by soldering, with about 35 minutes allowed. This is the moment when your separate bits of glass become the suncatcher you selected and adapted earlier.
Soldering is also the stage that makes the workshop feel like a real introduction to stained glass rather than a glass decorating class. You have already learned how to cut and shape the pieces. Now you see how the copper-foiled edges connect the whole design.
The final result is unique because you selected the pattern and colors and carried out the work yourself. Do not measure success only by a flawless finish. Your first piece is mainly a chance to learn the process, and the satisfaction comes from seeing the complete object after several hours of careful work.
Snacks, timing, and the value of the price
The workshop costs $136.49 per person and lasts about 4 hours and 45 minutes. Coffee, tea, juices, and snacks are offered throughout the class. Private transportation is not included, so you make your own way to Ir. Politechniou 9 and return there when the activity ends.
At first glance, the price may seem high for a single handmade souvenir. The value becomes clearer when you count what is included: nearly five hours of instruction, a maximum of two students, use of the studio and tools, a selection of glass, and the finished item you make. You are paying for guidance and workshop access as much as for the object.
I would still call it a special-interest purchase rather than a bargain activity. If you only want a low-cost thing to do between sightseeing stops, this is probably too expensive and too long. If you already like crafts, want personal instruction, or value taking home something made by your own hands, the cost is easier to justify.
Group discounts are available, though the class itself is limited to two people. Ask about the discount when arranging the booking if you are planning with another participant. The mobile ticket is convenient, and confirmation is provided at booking.
The class is near public transportation, but no private transfer is supplied. Build in enough time to reach the meeting point for the 10:00 a.m. start. Since the activity ends back at the same address, the morning is easy to plan around once you have arranged your route.
Who will enjoy this workshop most
I would book this for:
- Couples who want a shared project with plenty of personal attention
- Friends who enjoy crafts and do not mind working quietly side by side
- Beginners curious about stained glass but unsure how to start
- People who prefer a handmade keepsake to a shop-bought souvenir
- Anyone willing to spend most of a morning on one careful project
I would think twice if you dislike precise handwork or want a relaxed activity with no tools involved. The workshop is encouraging, but encouragement does not remove the need for patience. Cutting, grinding, taping, and soldering all require attention.
It is also not the right choice for anyone who needs to avoid prolonged standing or cannot wear closed shoes. Stools are available between tasks, but you should expect to work at a bench for much of the session.
What makes the experience feel personal
Linda’s teaching style is central to the class. She explains the process in stages, lets you practice on glass scraps, and provides drinks and snacks as you work. The atmosphere is intended to be relaxed rather than pressured, and the time is designed to let you work at your own pace.
That tone matters because stained glass can look intimidating at first. The tools, sharp edges, and unfamiliar methods may make you worry that one mistake will ruin the project. Starting with practice glass and using beginner patterns reduces that fear.
The personal element also shows in the finished piece. You choose the pattern and opal colors, then complete the physical work yourself. Linda’s role is to help you learn and correct problems, not to quietly take over and finish the difficult parts.
If you are visiting Rhodes with a partner, this is a pleasant way to spend a morning away from the usual archaeological sites and beaches. It gives you a different view of the island, one based on making rather than simply seeing. Just remember that the workshop is indoors and focused, so it is not a sightseeing tour with regular stops.
Should you book the Rhodes stained glass workshop?
Book it if you want close tuition, a private two-person setting, and a souvenir with your own fingerprints on it. The long schedule gives you time to learn the full beginner process, and the included refreshments make the morning feel well supported.
Skip it if the $136.49 price is beyond your activity budget, if you prefer a quick class, or if standing and detailed handwork will be uncomfortable. For the right person, the strongest value is not the glass alone. It is the chance to learn a new skill with Linda and finish a personal suncatcher in one morning.
FAQ
Where does the stained glass workshop take place?
The workshop starts at Ir. Politechniou 9, Rodos 851 00, Greece. The activity ends back at the same meeting point.
What time does the class begin?
The workshop starts at 10:00 a.m.
How long does the experience last?
The class lasts approximately 4 hours and 45 minutes.
How many people can participate?
The class is limited to two people. It is a private activity, so only your group participates.
What will I make during the workshop?
You will make a stained-glass suncatcher using the Tiffany method. You take home the piece you create that day.
What skills will I learn?
You will learn how to use the basic tools, cut clear and colored glass, choose a beginner pattern, grind glass edges, apply copper tape, and solder the pieces together.
Are food and drinks included?
Yes. Coffee, tea, juices, and snacks are offered throughout the course.
Is transportation included?
No. Private transportation is not included. The workshop is near public transportation.
What should I wear, and are there participation restrictions?
Wear sensible clothing and closed shoes. You will usually be standing at a workbench, although stools are available between tasks. The workshop is not suitable if you are pregnant or breastfeeding.